Create a Mailing List | Google Apps for Education
The WNS local directory has grown in the last year. The
directory will include our sub-organizations Middle School and High School. If you
regularly send email to the same group of people, it would advisable to create
a mailing list which will simplify the process, and you don’t have to worry
about sending it to the wrong recipient[s] or missing out on someone.
How do I do this?
On the Left had column you will see Mail with a chevron
facing down. Click on it and select contacts.
When the contacts menu is
populated you will see all your current contacts on the right hand side.
Move down the options on your left and select NEW Group, a new group
dialogue box appears, Type in a name for the group [For example WNS, work, office, etc] and click OK to create it.
dialogue box appears, Type in a name for the group [For example WNS, work, office, etc] and click OK to create it.
Select the new group you have
created now listed on the left and add then people you want populated in it.
A new group will be shown on your Contacts with a number of contacts in parenthesis(). For this example WNS2016(83)

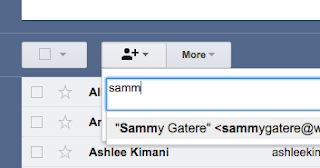
Click the add new user by typing their name and clicking add. Continue with the same procedure and the “new” emails will be listed in your “new” group.
When you are done, click
contacts and then select Mail, which will redirect you to the original page.
Click on compose, to send and email to the “new” group you have created, in this example my group is called WNS2016. It will then populate all the address you added to it. You may do this on the BBC field if you do not wish the recipients to know you sent emails to the entire group.
Click on compose, to send and email to the “new” group you have created, in this example my group is called WNS2016. It will then populate all the address you added to it. You may do this on the BBC field if you do not wish the recipients to know you sent emails to the entire group.


